Getting Started – Adding Your First Panorama
Overview
ThreeSixty Tours has three components: Viewer, Editor, and Dashboard. The Viewer lets the world see, navigate and share your panoramas and tours. The Editor lets you edit, annotate and connect your panoramas into tours. The Dashboard provides account, panorama, and tour management.
ThreeSixty Tours viewer was designed to be flexible and can be used to display tours or individual panoramas. Tours are groups of linked panoramas and have a many-to-many relationship. Meaning, a single panorama can be used in more than one tour and/or displayed on its own.
Creating an Account
Creating a new ThreeSixty Tours account is easy. Start by visiting our registration page at http://my.threesixty.tours/register. Fill out the registration form, accept our Terms of Service and you’ll have a free account. Upon successful registration, you will be redirected to your Account Dashboard.
Registration Form
Account Dashboard
Your account dashboard acts as a hub for your panorama and tour management.
- Notifications – Important updates about your account status and threesixty.tours
- Settings – Manage account contact information, password, subscription, and email support.
- Limits – Displays the limitation your current subscription is limited by.
- Tours – All tours are created and listed here.
- Panoramas – All panoramas are listed and created here.
- Branding – If allowed by your subscription level, set the viewer default branding.
- Import / Export – If allowed by your subscription level, export and import tour and panorama data by .csv file.
- Custom Domains – If allowed by your subscription level, you can create custom domain names for use while viewing your tours. See the custom domain documentation for more details.

Dashboard
Creating your first Panoramic Picture
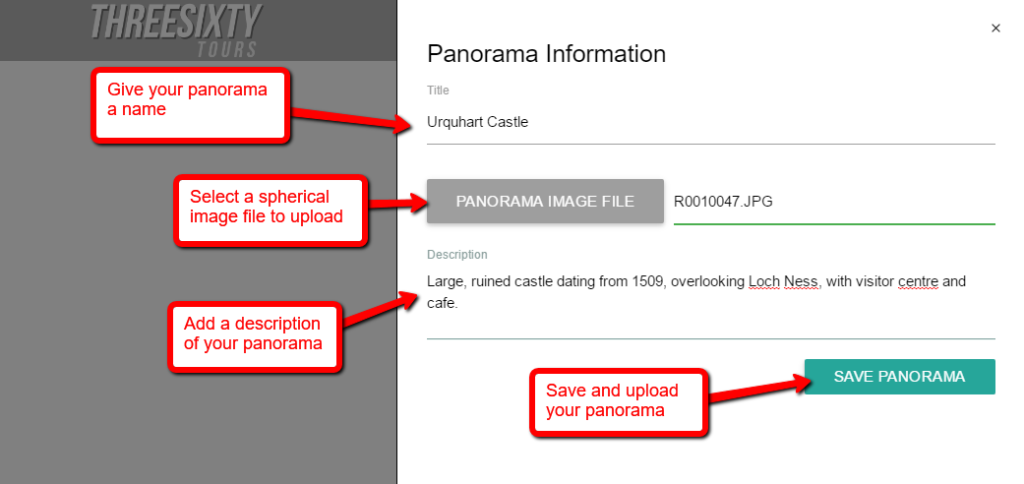
Create Panorama
Create a panorama by clicking the “New Panorama” button in the Panoramas section of the Dashboard. This will open a blank Editor that is waiting for you to upload a Panorama.
- Enter a panorama title.
- Select a spherical image file.
- Enter a panorama description.
- Save panorama.
After saving, your panorama file will be uploaded and created in the Panorama Editor. Here you can add/edit Markers and update the panorama name, image, and description.
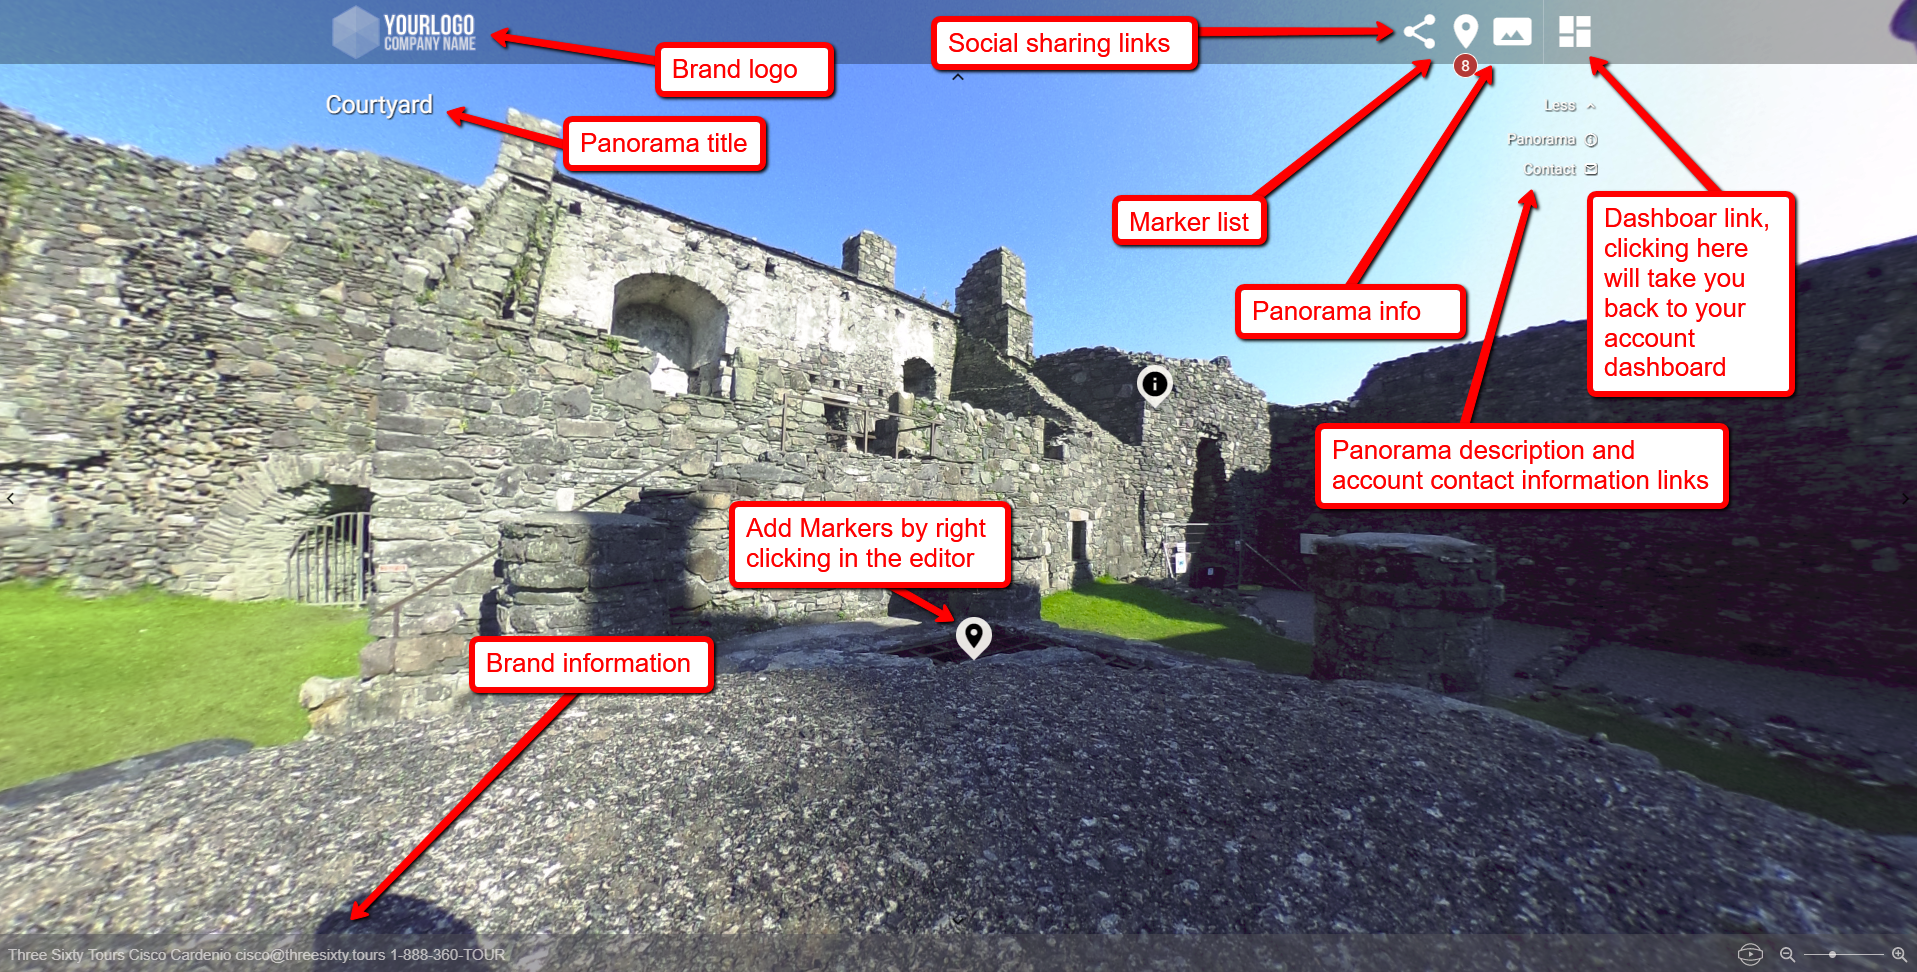
Panorama Editor
Adding and Editing Markers
Once your panorama has been uploaded you can annotate its details by right-clicking to drop markers. You can edit markers by hovering with your mouse pointer and selecting the Marker Edit Button. When clicked, a ThreeSixty Tours marker can have one four marker action types.
- Show Description – these markers display their description in a modal window.
- Matterport
- External Link
- Iframe Embed
Creating your first Tour
Congratulations, you’ve mastered the basics of using ThreeSixty Tours!
Once you have two or more panoramas or 2D images uploaded you’ll be ready to move on to adding/editing your first “Tour”.