Creating & Editing a Tour
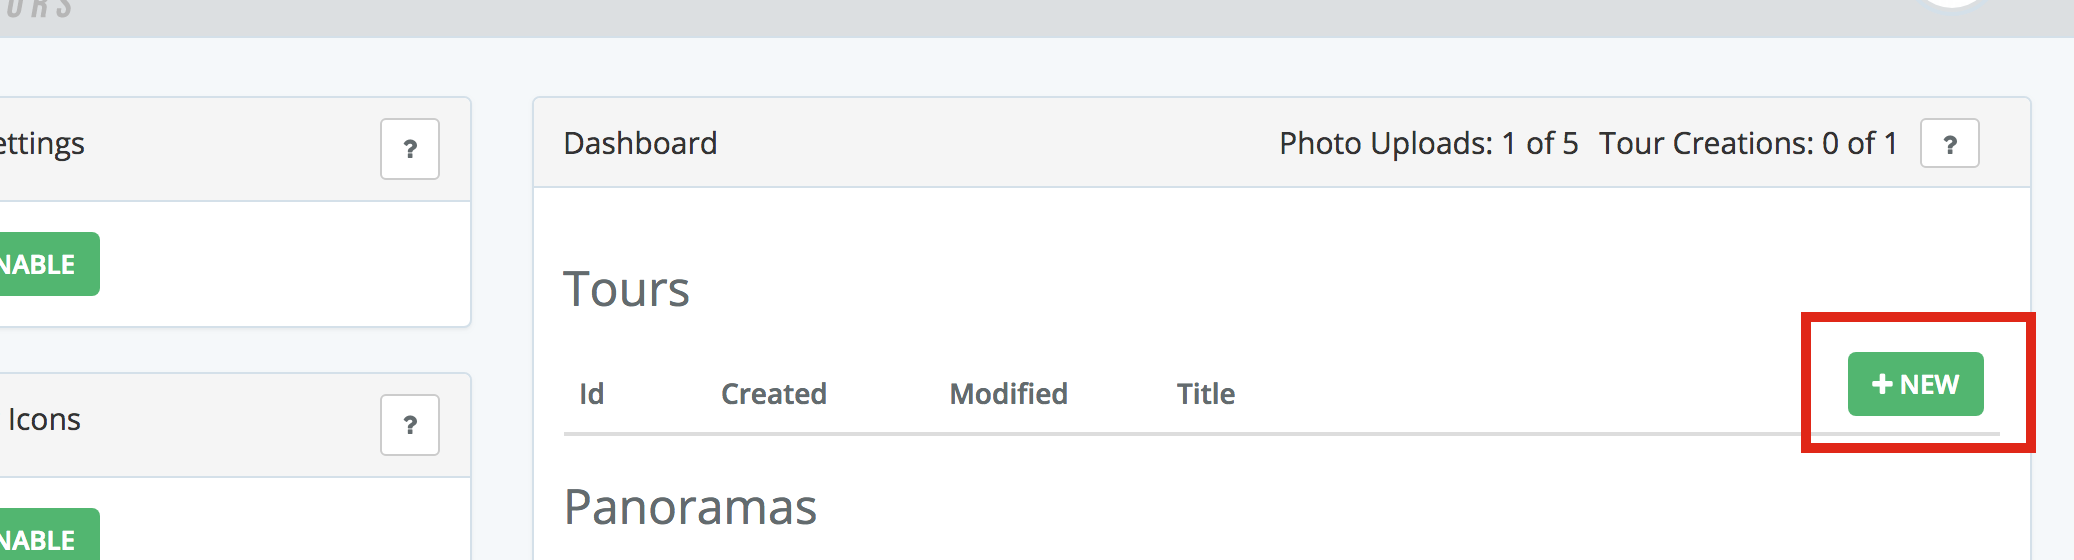
You must have at least two or more saved Panoramas or 2D Images in order to generate a “Tour”. Get started by clicking the “+ New” button in the “Tours” section of the dashboard. This action will open a blank tour editor, and from here you can edit your tour details and add panoramas.
* Free Accounts only get one tour. Once created it can not be deleted.
Screenshot:
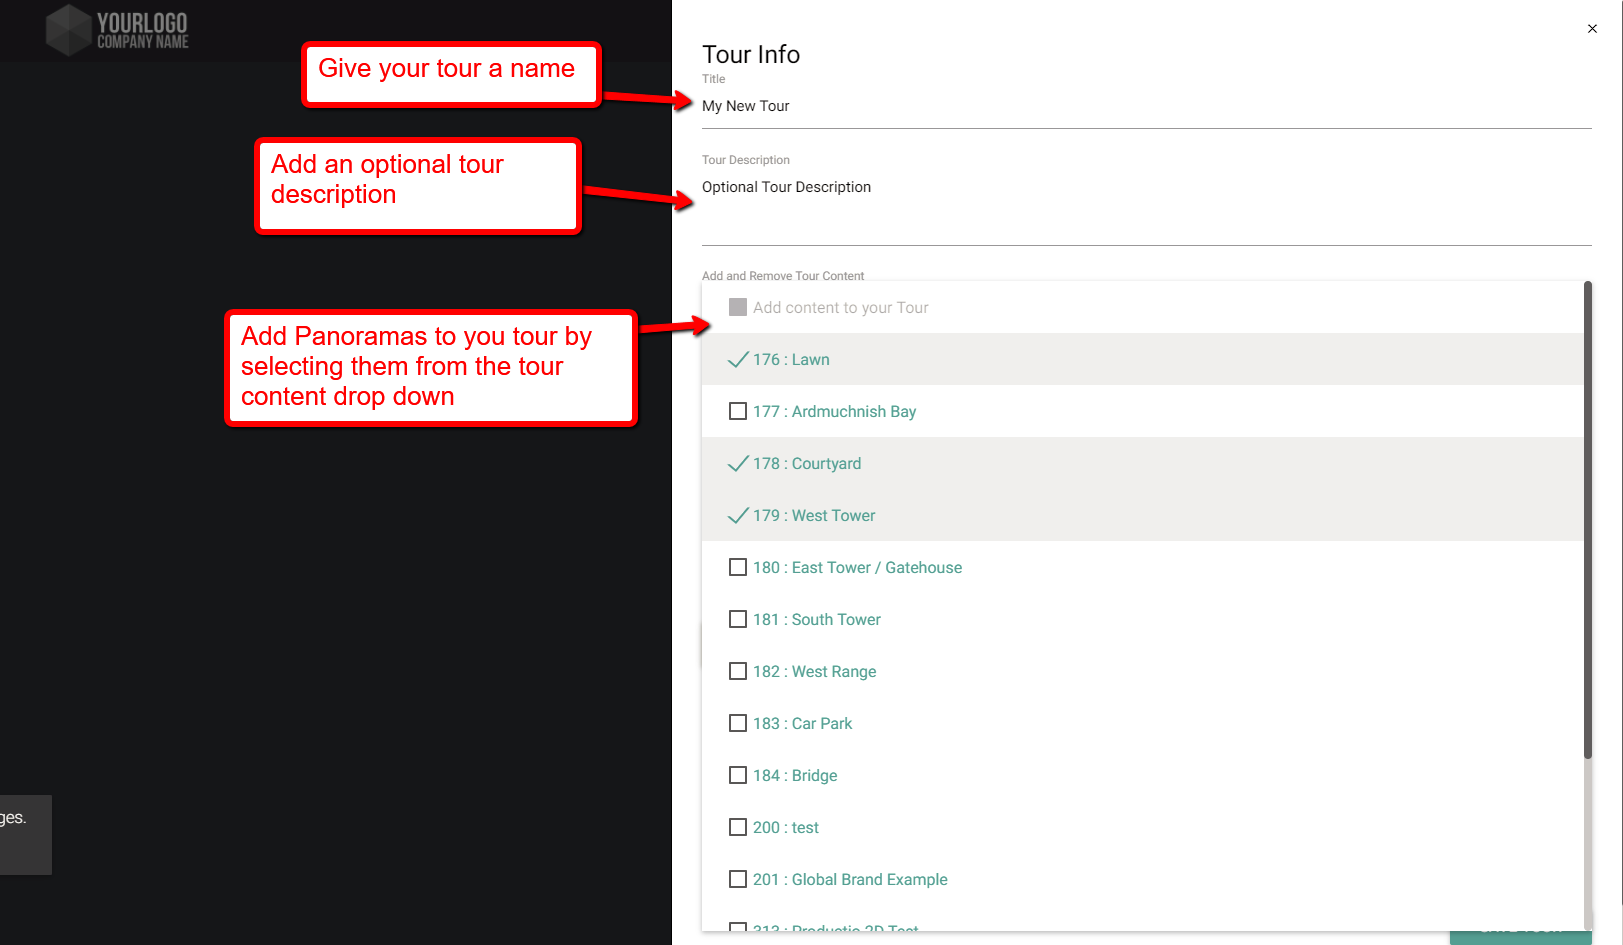
Tour Details
- Enter a Tour title.
- Optionally enter a Tour description.
- Add panoramas to your tour via the “Add and Remove Tour Content” drop down.
- Customize your tour’s branding, see the branding documentation.
Screenshot:
Once you’ve created your Tour, each associated Panorama and/or 2D image will be displayed as a thumbnail in the new “Tour Navigation” tray at the bottom of your viewer.
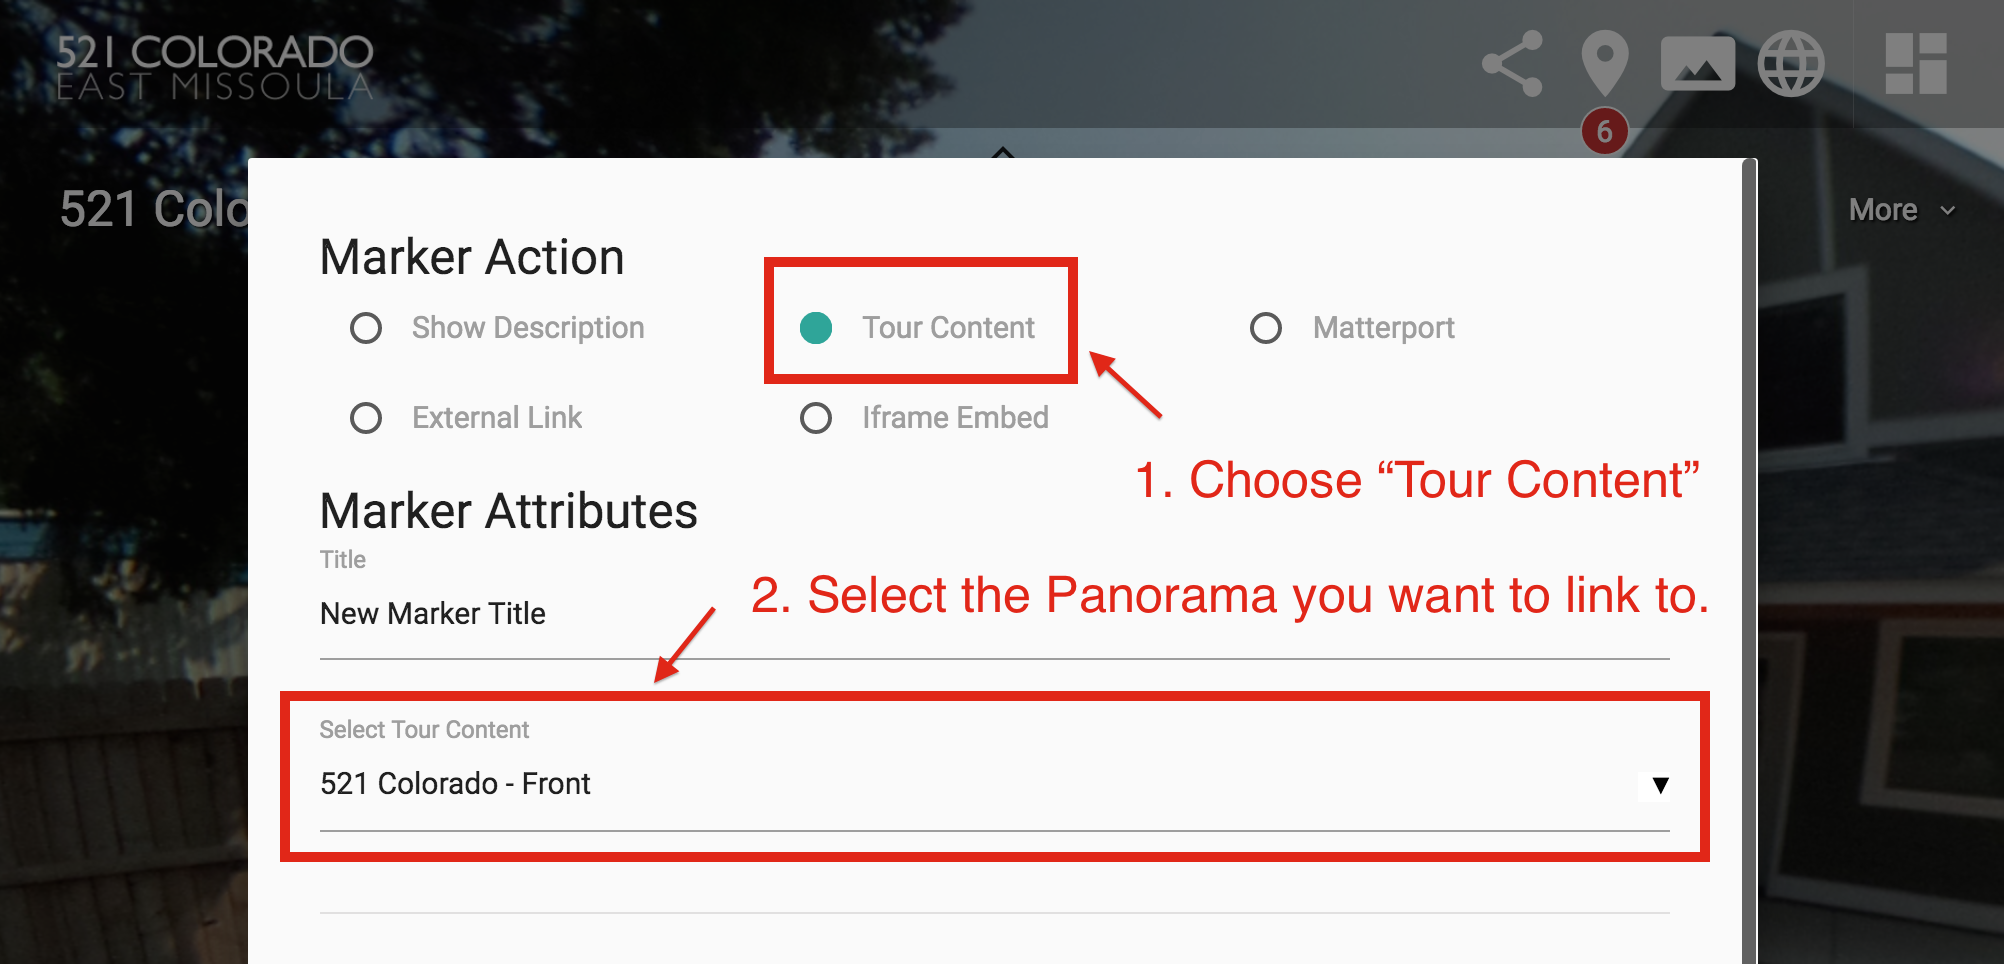
Linking Panorama Markers to Tour Content
When editing a “Tour” you now have the option to choose from your linked panoramas when creating new Markers.
NOTE: This specific Marker Type is only available when editing a “Tour”.
Screenshot:
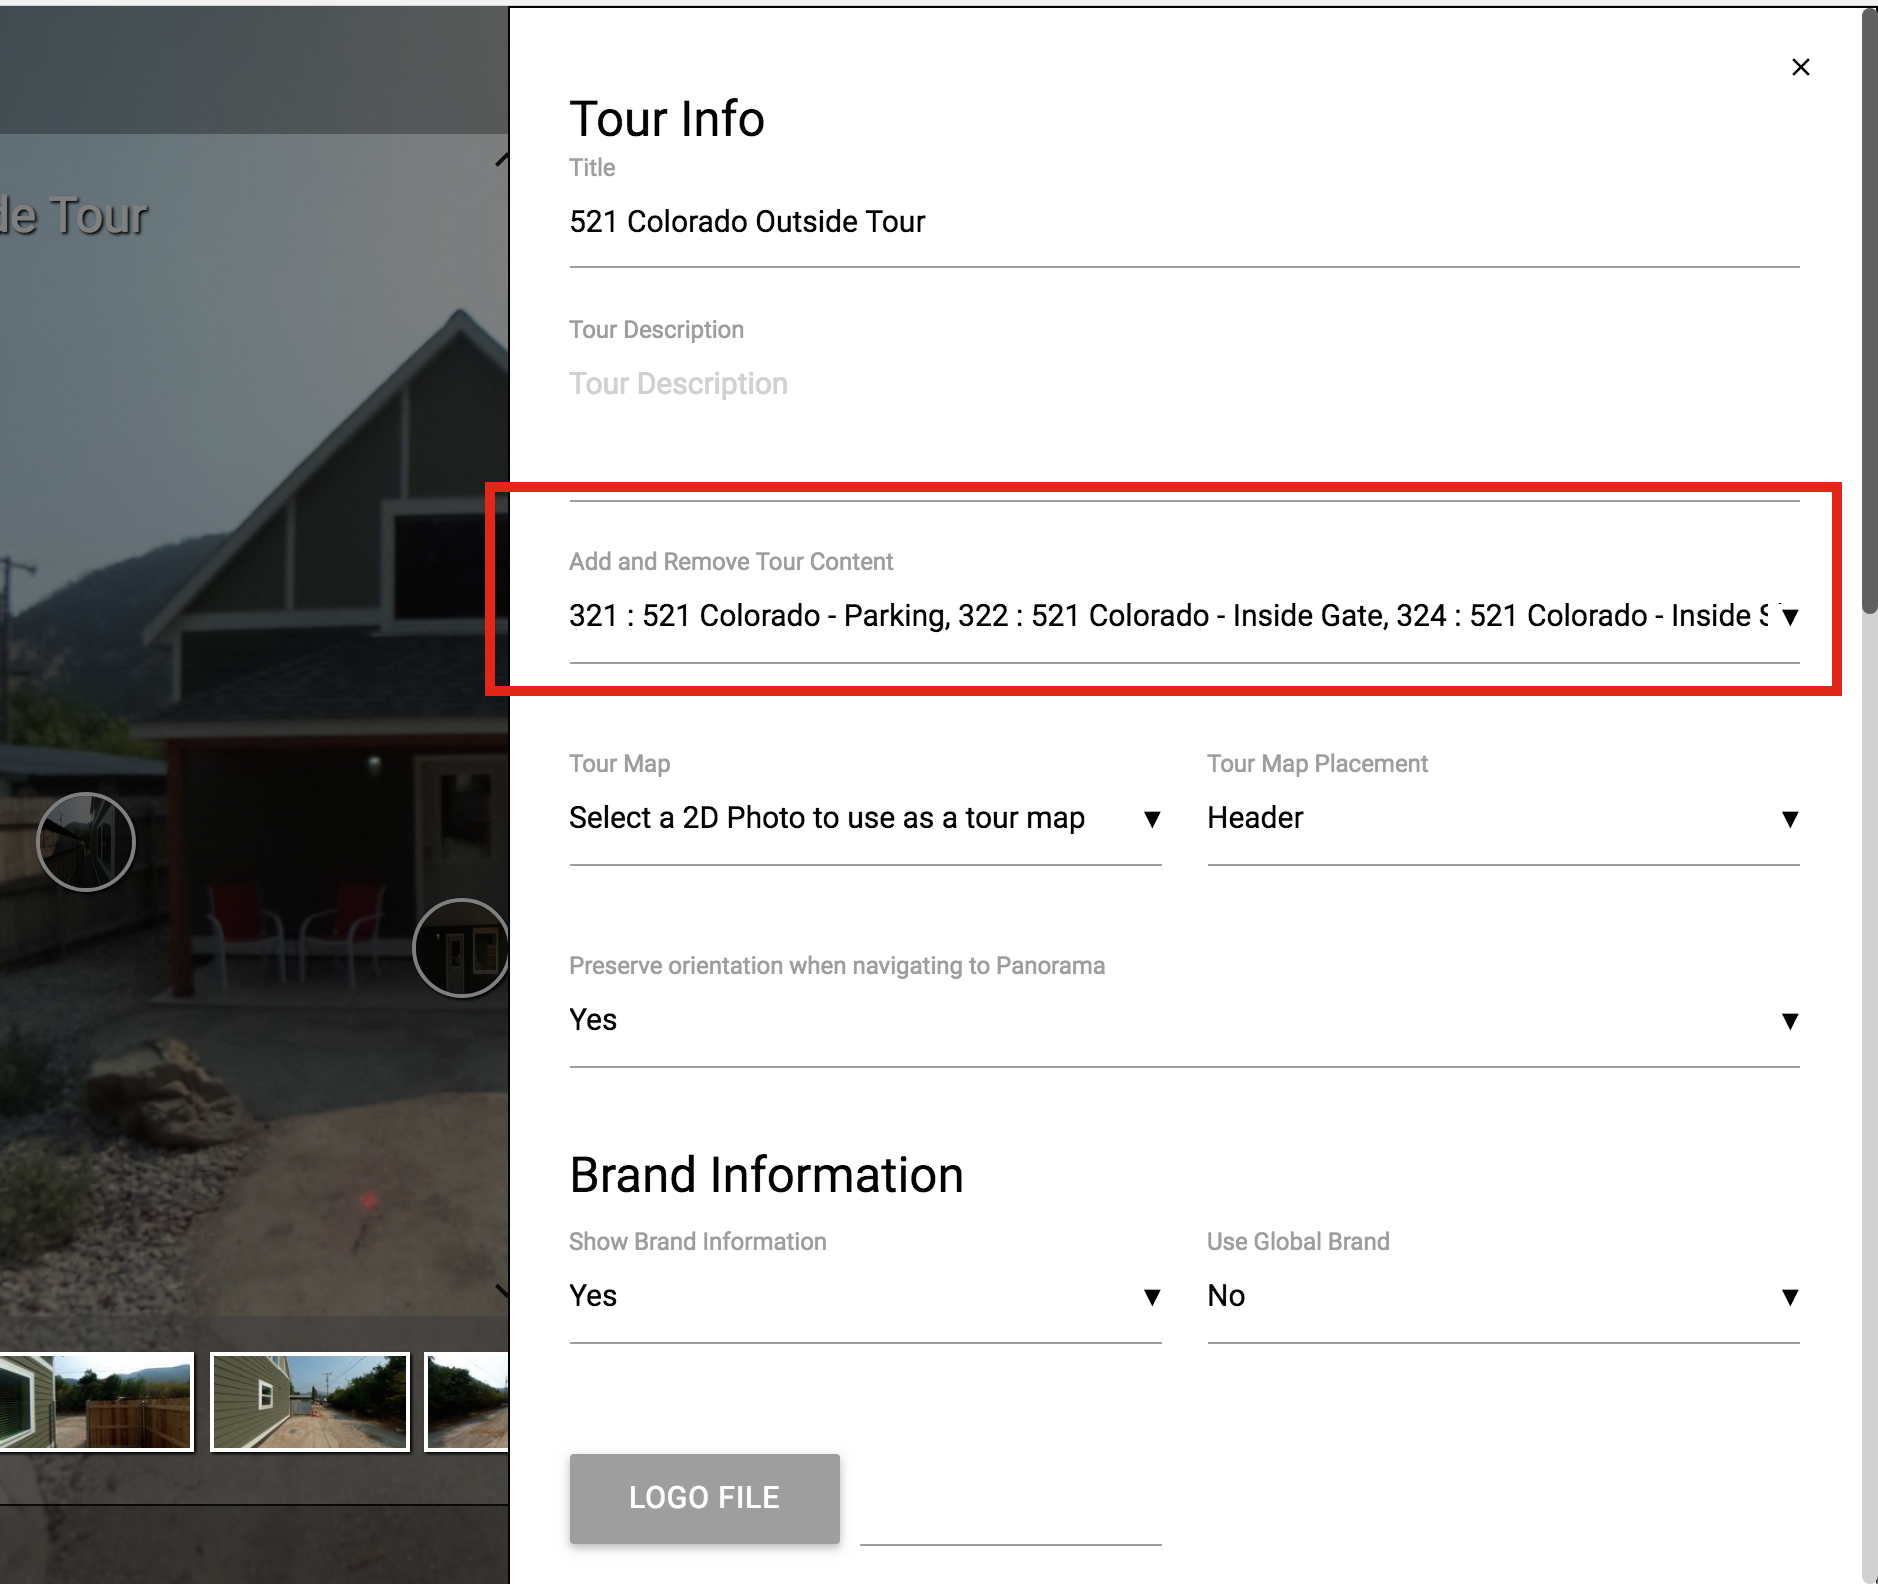
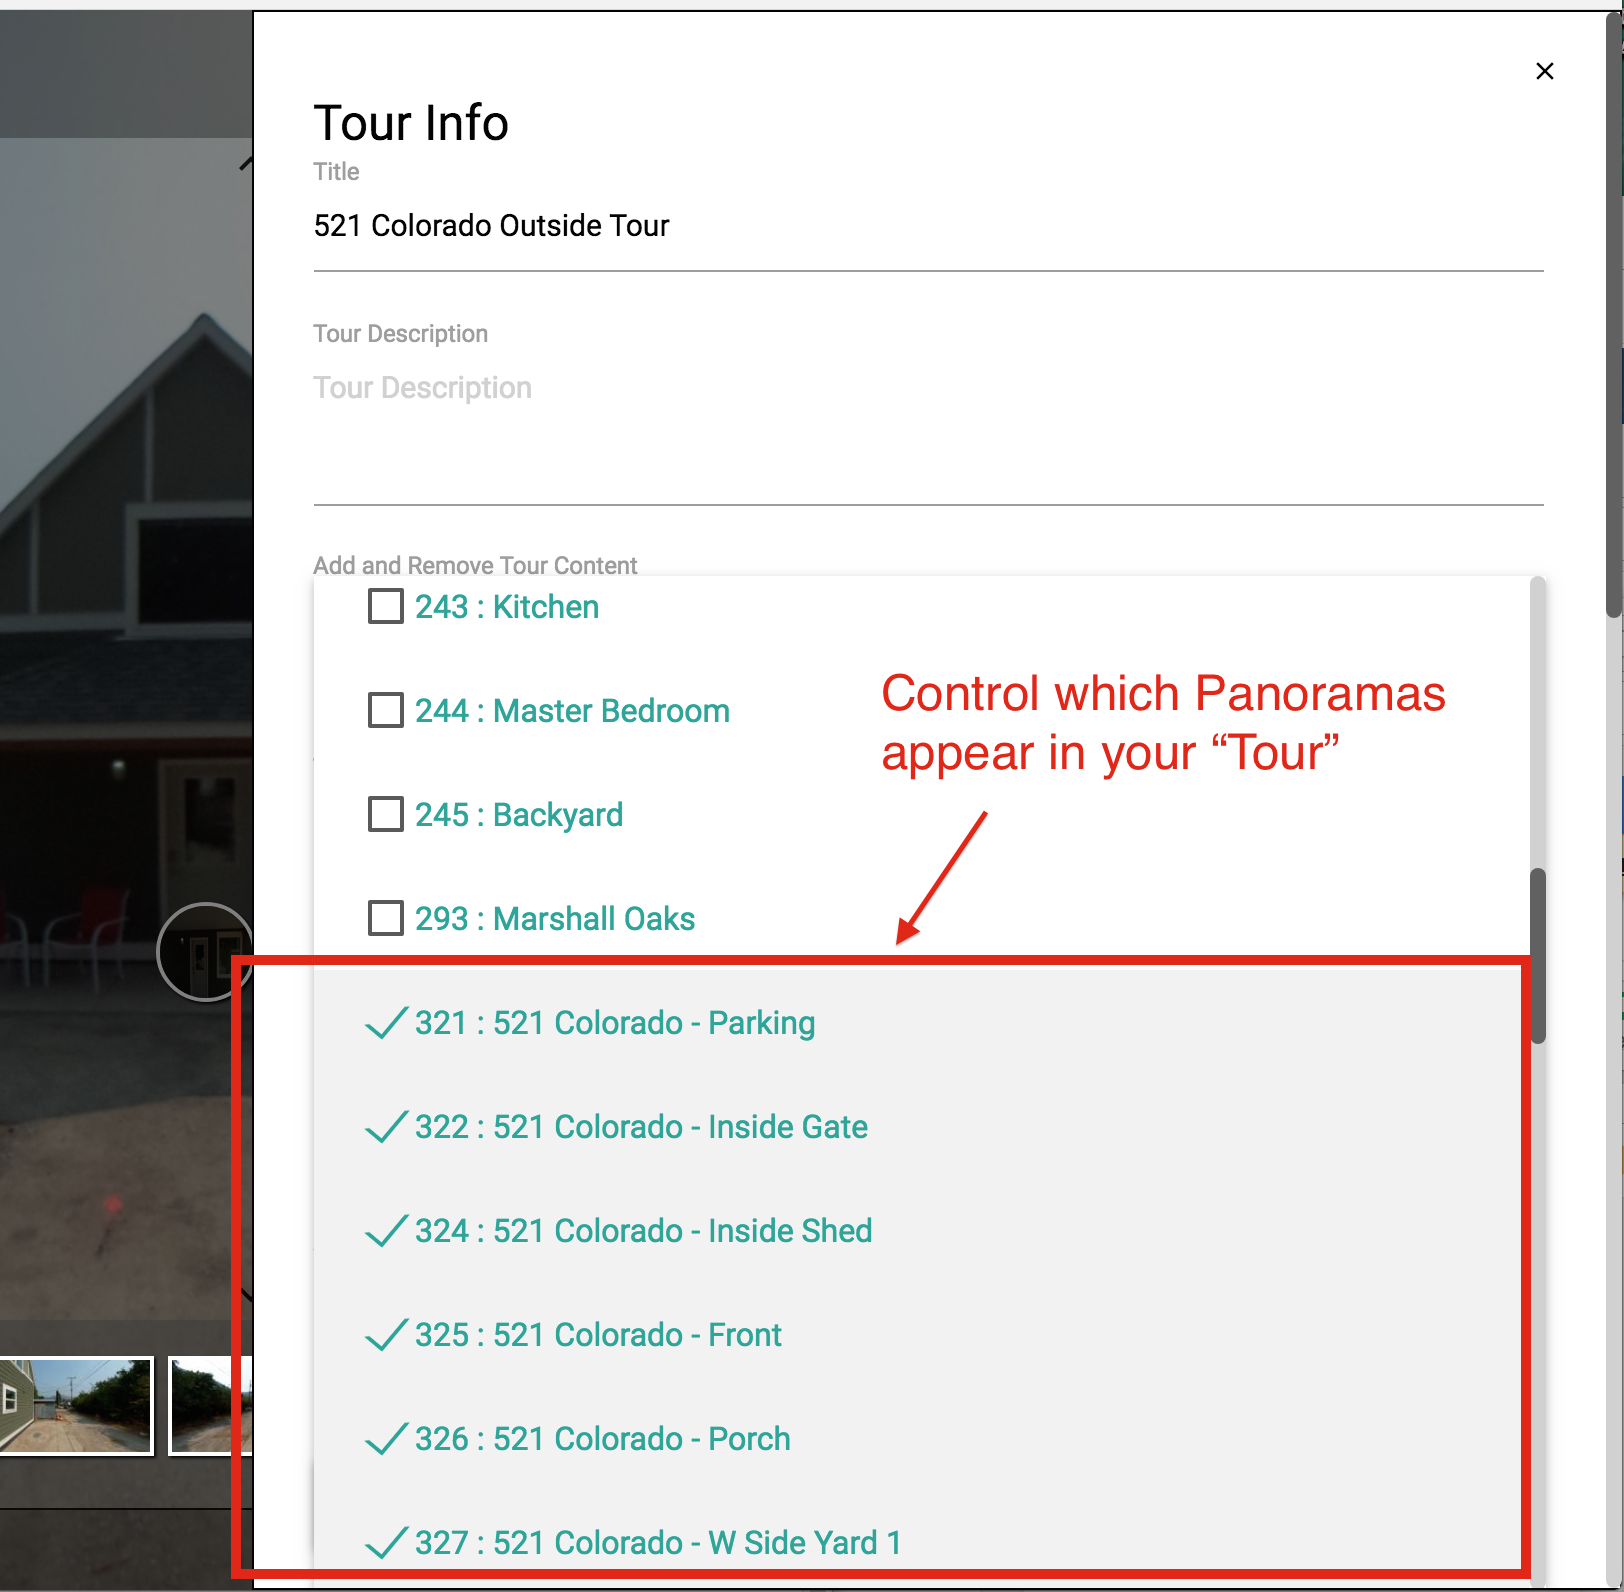
Editing Existing Tour Content
Use the following instructions as a guide if you have an existing Tour, but need to add or remove associated Panoramas/2D content.
Screenshots: