Creating Your First Virtual Tour – Basics
Overview
We have presented this content in video form or written form for you to enjoy as you like in both formats.
In this article/Video we are going to show you how to create a virtual tour of a luxury house. We will be adding different sections of the house to complete the entire virtual tour of the luxury house.
You can see the full virtual tour here.
Recommend threesixty.tours to Someone
To Create a Virtual Tour you want to log into your threesixty.tours Dashboard and this is what you will see (see image below). The dashboard is split in 3 sections:
- Tours
- Panoramas
- Photos
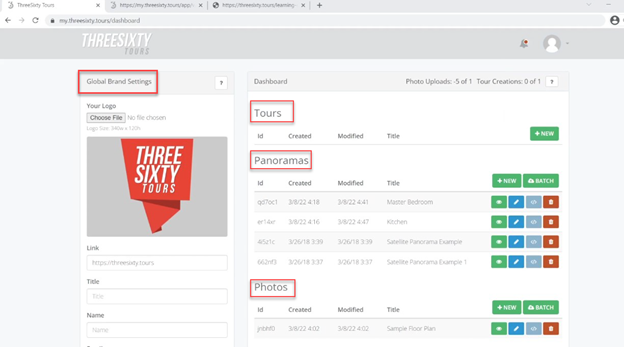
Dashboard
The panoramas are the 360 degree images that you are going to upload and once you upload several panoramas then you can create a tour.
The photos are the images that you use to add floor plans. You can read more on that here.
On the left side of the dashboard is the brand settings and this is where you add your company logo, website link, email address and phone number. Once all information is filled in, click on save.
The first thing you want to do on the dashboard is to add a new panorama. To add a new panorama image, click on NEW under the panorama section. In our example we will add a panorama of the living room of the luxury house
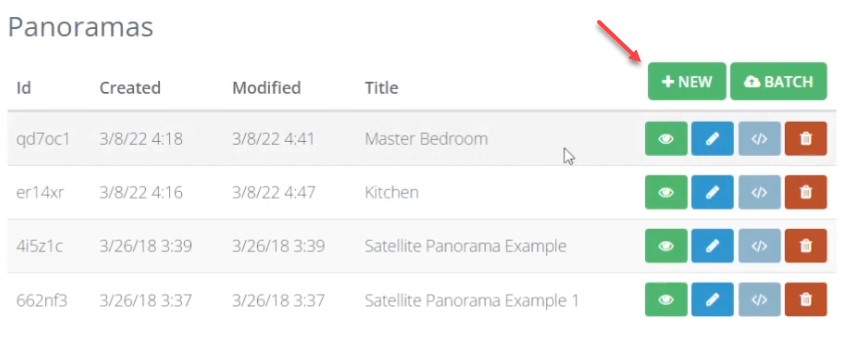
Create a New Panaroma
Once the panorama screen opens, fill out the Panorama title which should generally describe the panorama: such as “Living room”. Upload the 360 image through image file. And click Save Panorama.
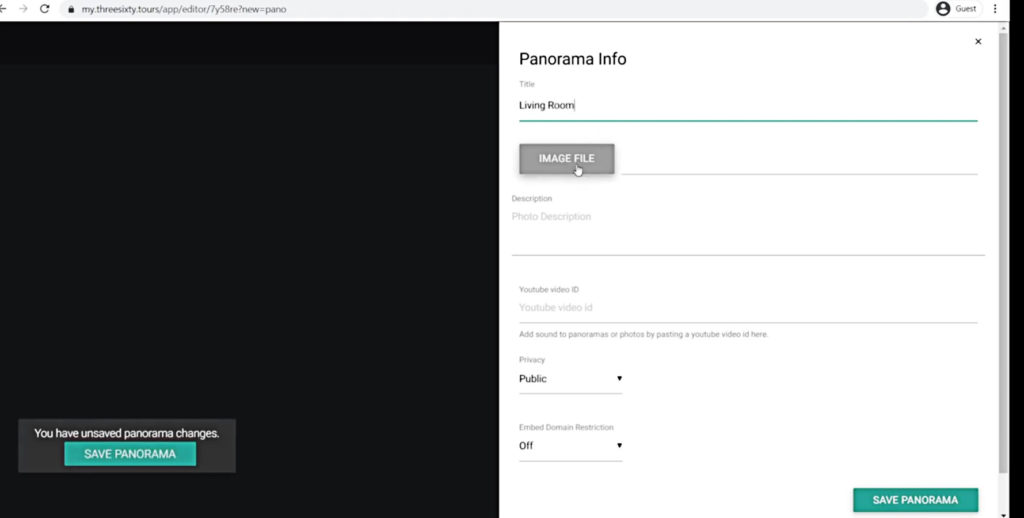
Saving a Panorama
Once its saved, the image will be loaded and shown in your dashboard. On the 360 image itself, you will see the title of the image, in our example here it is the “Living Room” which is what we added in the panorama title in this example.
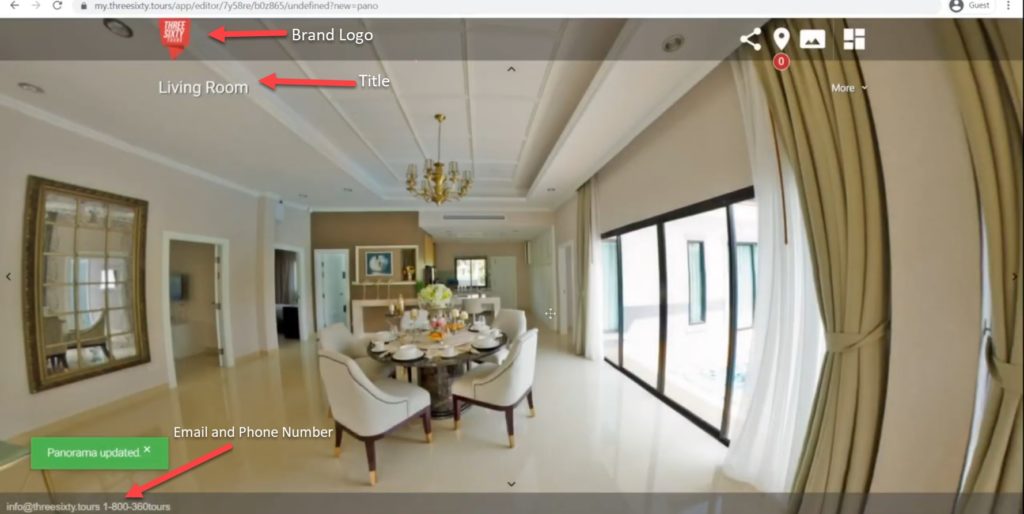
Panaroma Image Identification
From the Branded Global Settings that we set up, the branded logo, URL, email and phone number will be shown on the image.
On the top of the image, click on the Panorama Settings Button (see image below) which gives you the option to edit the Panorama info and save the changes.
On the top right, click on the Back to Dashboard icon.

Panaroma Settings Button
In the Dashboard, the panorama added should now be added in the Panoramas Section. In this case since we added the living room then we see the living room panorama.
You can edit the Panorama information by clicking on the pencil image (Edit).
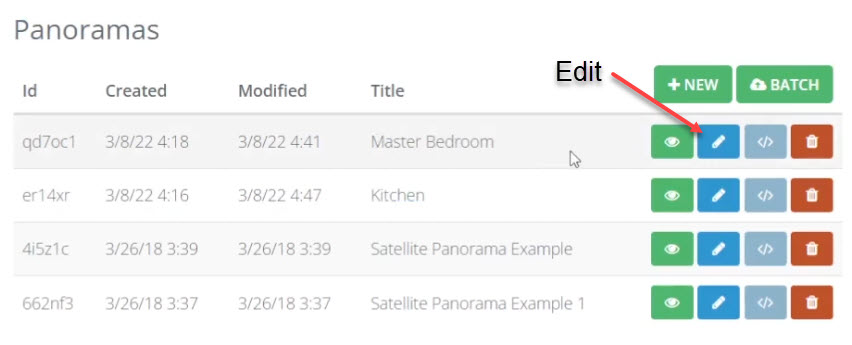
Edit Panorama in Dashboard
Once you have several panoramas uploaded, you can now Create a virtual tour.
Under Tour, Click on New
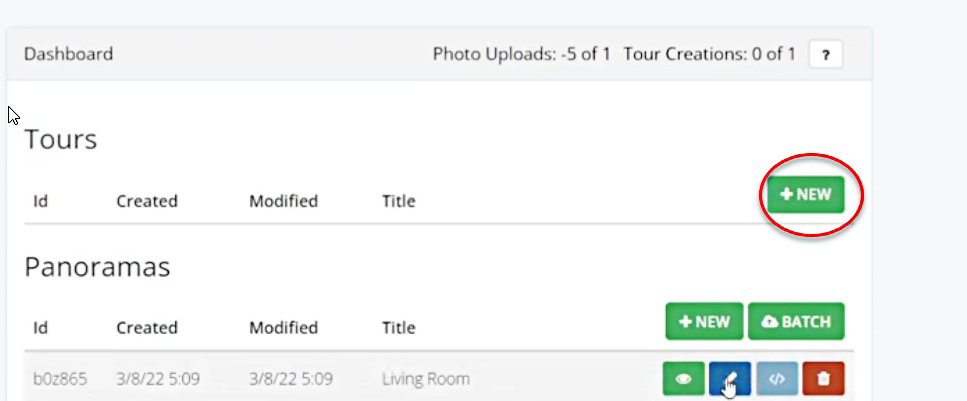
Create a New Virtual Tour
In Tour Info, fill in the information you would like such as add the Title & Tour Description. Next select the Panoramas needed for the virtual tour. The panoramas needed to create a virtual tour are added in the “Add & remove tour content” and are referred to as tour content. As seen on image below we have:
Title: Luxury House Tour
Tour Description: 3 Bedroom House with Pool
Add and Remove Tour Content: These are the panoramas you would like to add to your virtual tour. Note that in the example below we have added more panoramas and renamed them kitchen, master bedroom, etc.
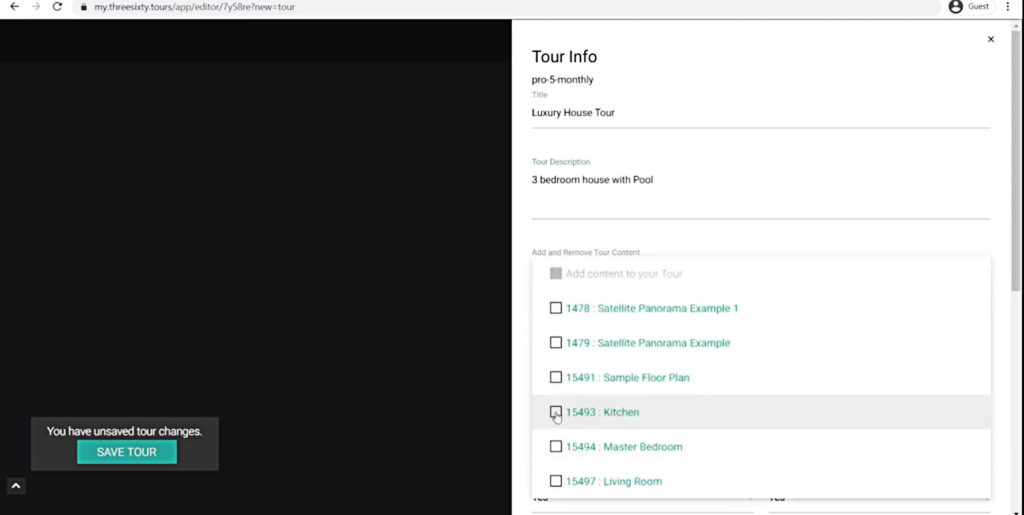
Adding Virtual Tour Content
Once you add all the panoramas you would like in the virtual tour then Save the Tour.
You can also arrange the order of your virtual tour Panorama List to choose which panorama to start the tour with by dragging the title of the panorama up or down.
On the image, we have Kitchen as our starting point of the tour. You can drag living room to the top so that the tour starts with the living room.
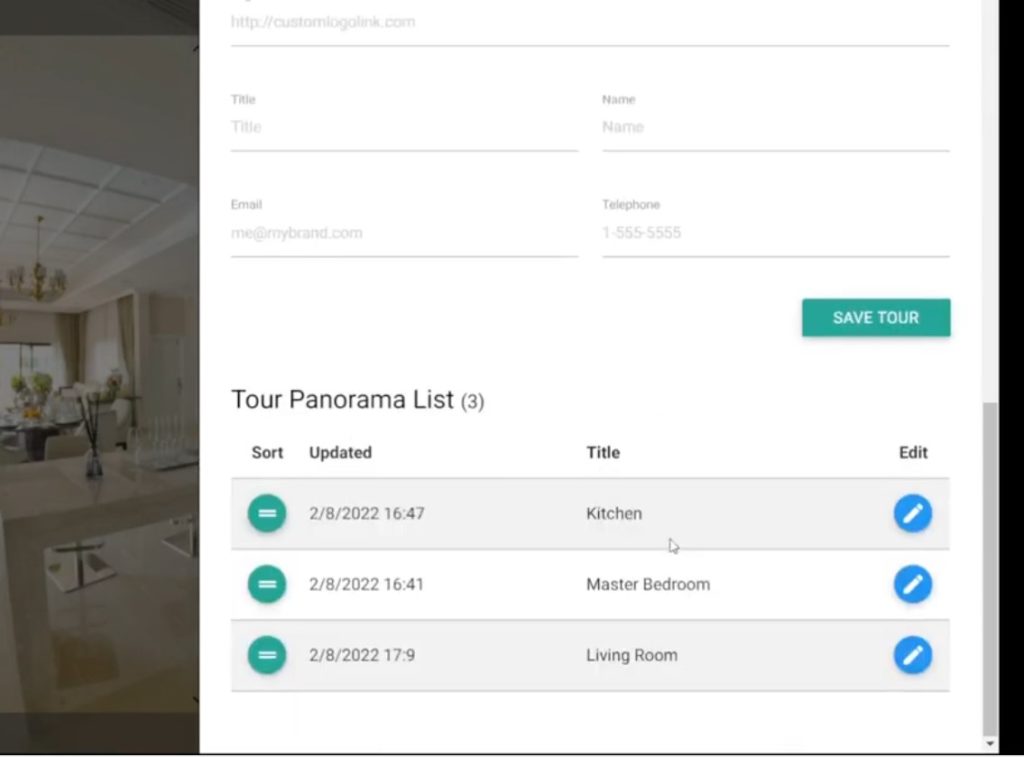
Panorama Content in Virtual Tour
Once you save the tour you now want to place a marker of the living room to show other panoramas (tour content) or simply display information (more on that here).
So in this case (in the image below) we are in the kitchen and want to add a panorama of the living room so that viewers can go to the living room. Right click to place a marker or a hot spot. To edit the marker click on the pencil icon.
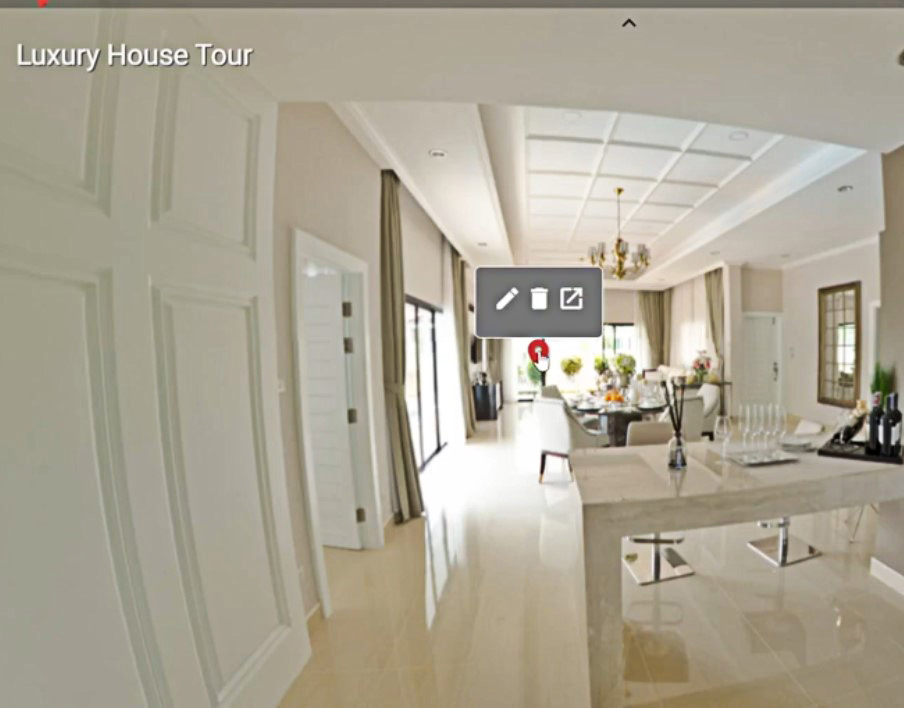
Add a Marker by Right Clicking
On the page, you will see marker actions. For this tour, we will choose Tour Content to select other panoramas. Under Select Tour Content, select the panorama you want to display.
So for our example here we click on Living Room to show the living room panorama. Keep the Title Living Room and Hit Save.
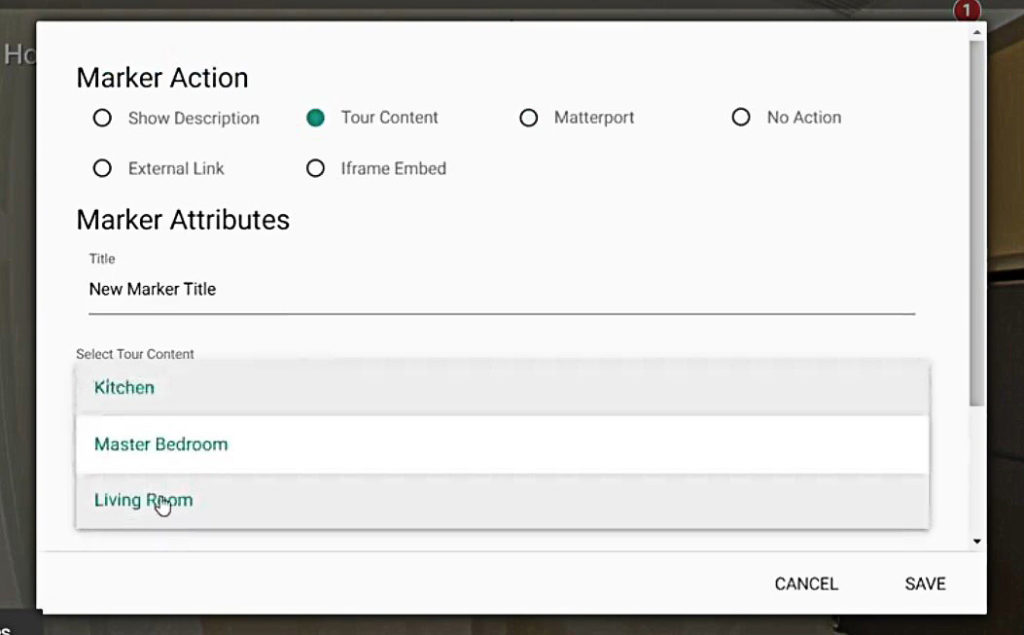
Changing Marker Settings
You should now see a circle with the image of the panorama, in this case an image of the living room. Click on the icon as shown in the image below to go to the panorama or in this case go to the living room.
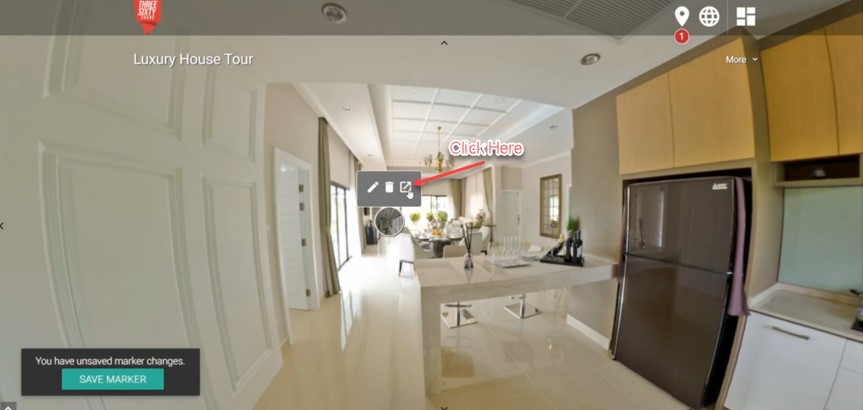
View Marker Settings
Now you want to add the tour content or panorama back. So in this case From the Living Room back to the kitchen. You can do that by adding a marker that leads to the Kitchen.
To add a marker you right click where you want to add the panorama. You can now repeat the process above:
In the settings, choose Tour Content. Under Select Tour Content, click on the panorama you would like. Keep the Title as is and Hit Save.
You can also add some animations on the Marker. As seen on the image below.
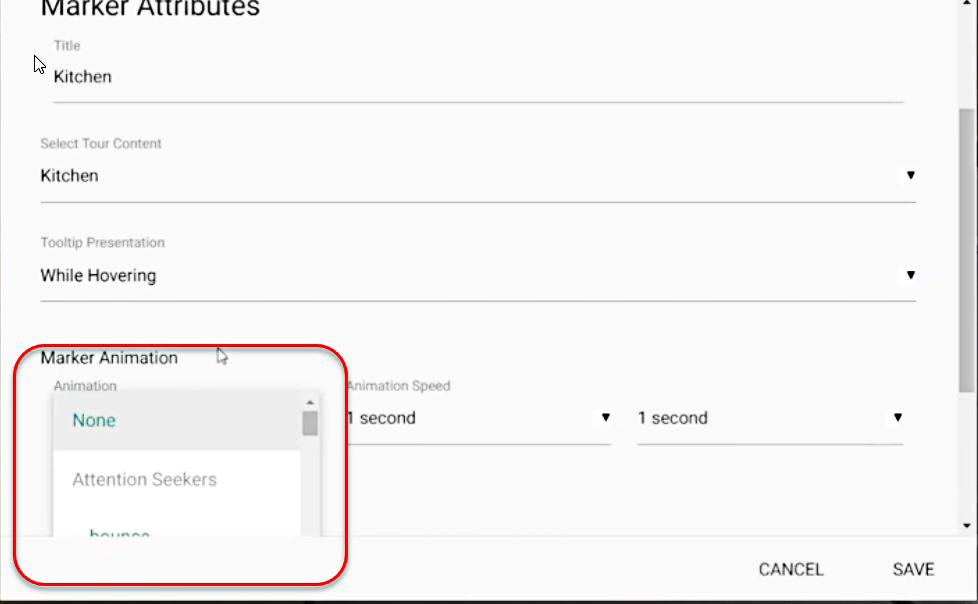
Repeat all steps for adding new panorama and add them to the tour content.
Once you added the panoramas to your tour content, you will see markers set up as seen on the image below. The tour should be complete, and that’s how you create a virtual tour! You can now add more information if you like.
In the example of the luxury house from the living room, we have the markers in the Kitchen and the Bedrooms.
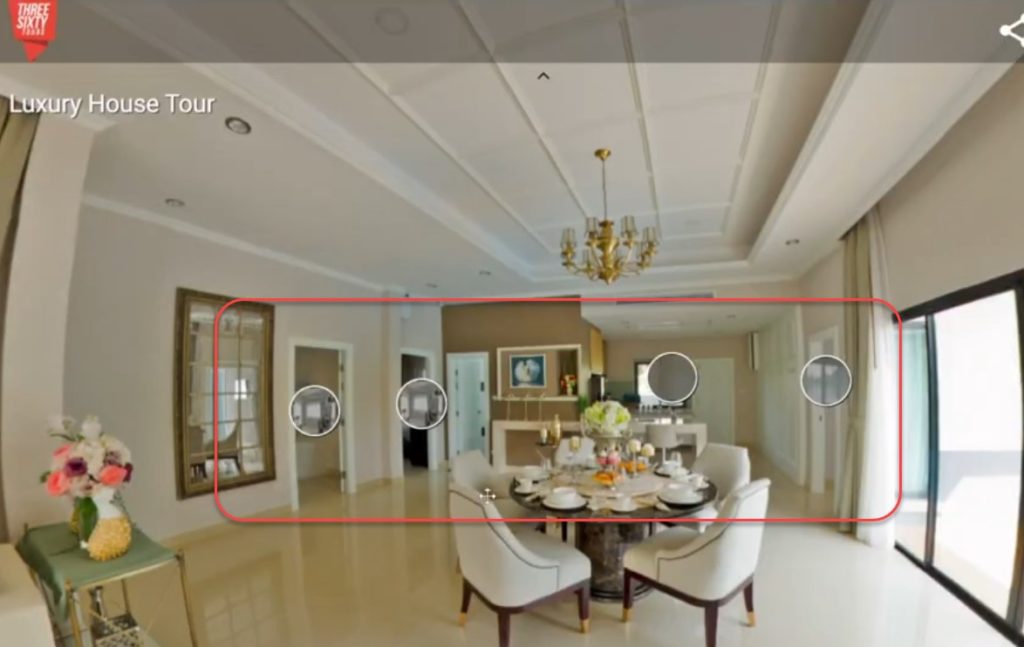
Tour Content Displayed
In this example we have added tour content to the entire house. You can see the full tour here. So moving the cursor, you will see markers for the whole house including the pool and the front gate.
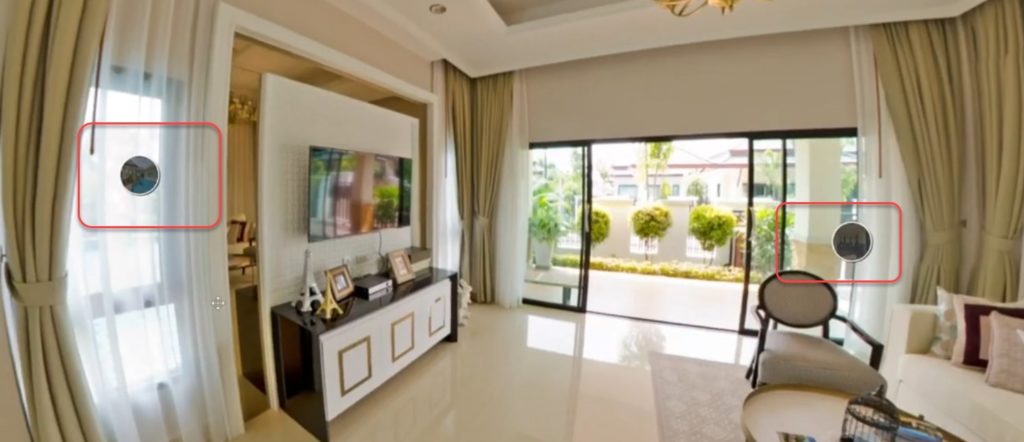
Virtual Tour Content Displayed
Here is what our Swimming Pool looks like
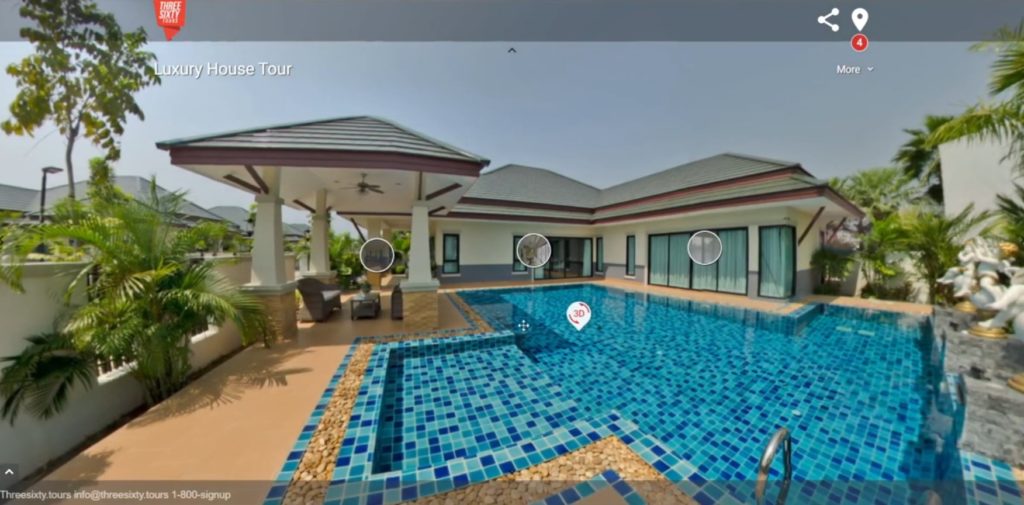
Virtual Tour Content Displayed
On the top right, if you click on the more section you can see more information that we added about the tour.
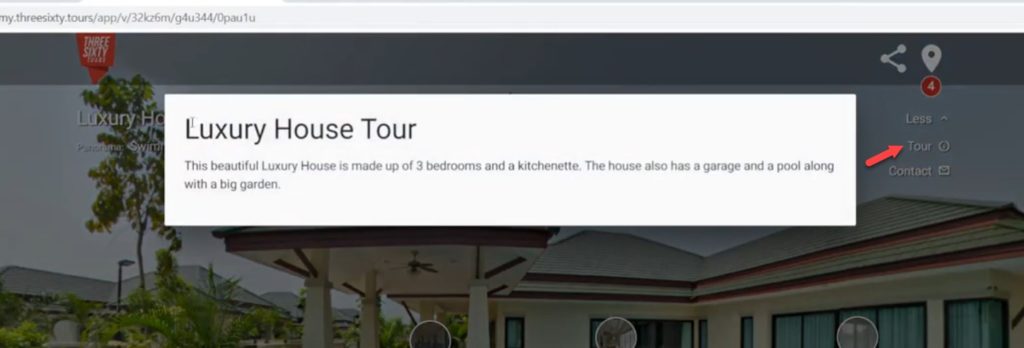
Virtual Tour Description
We also added contact details as see in the image below.
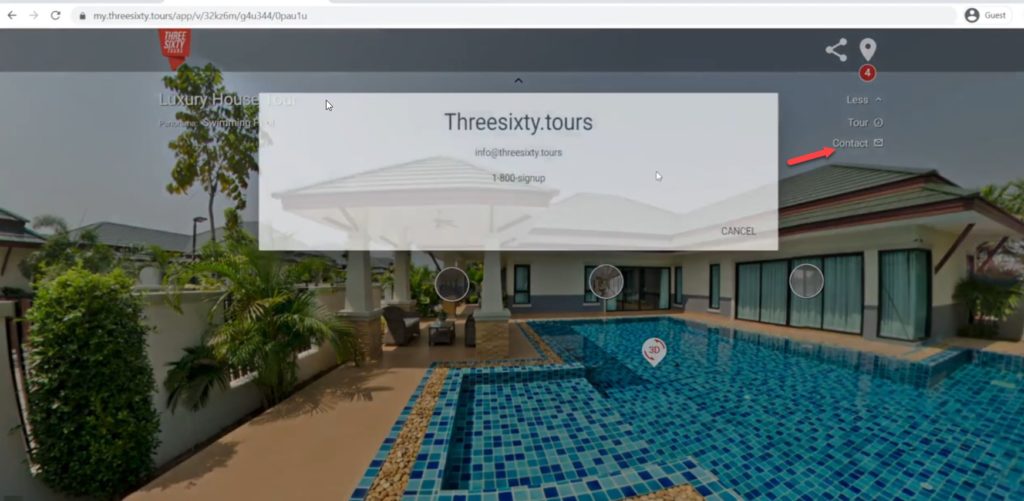
Virtual Tour Contact Details
You can also share your tour to your social media. Share it to Facebook, Twitter or Copy URL.
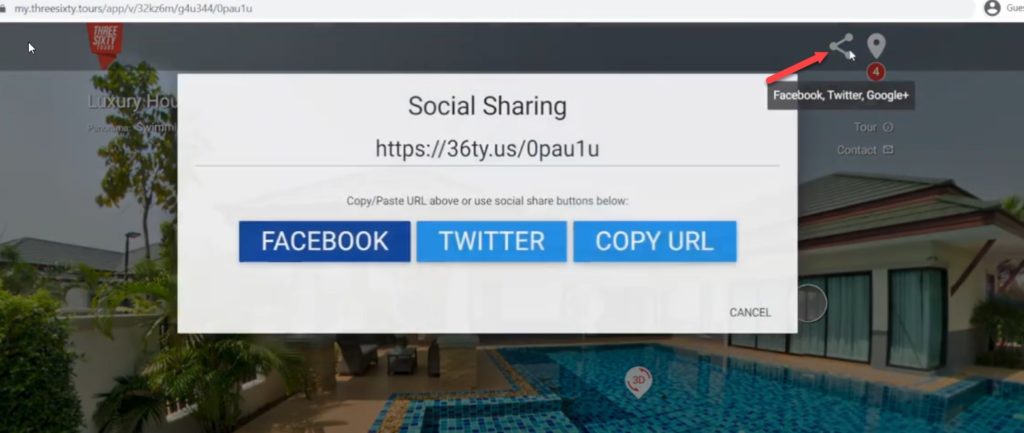
Social Media Sharing
If you would like more information then go to our website and click on help center “Learning Center” to get more information on how to use the threesixy.tours virtual tour software.
Recommend threesixty.tours to Someone
Check Out More Tutorials from Our Learning Center
Getting Started – Adding Your First Panorama
Overview ThreeSixty Tours has three components: Viewer, Editor, and Dashboard. The Viewer lets the world see, navigate and share your
Viewer Branding
ThreeSixty Tours provides customizable identity options for company branding text & logos in the upper and lower corners of the
URL Parameters
URL parameters allow paid ThreeSixty Tours customers to control the behavior of their tours in their <iframe> embeds and when linking
Adding Custom Domain Names
Starting at the BUSINESS subscription level, users can customize the domain name seen in the 360 viewer. Custom Domain Setup
Batch Upload Panoramas
Three Sixty Tours makes uploading panoramas and creating tours a breeze with its drag-and-drop batch upload feature. Batch uploading allows
Adding Matterport Markers
Matterport Marker Content We’ve built ThreeSixty Tours to be fully compatible with Matterport 3D Tours and even created a custom
