Creating Your First Virtual Tour – Part 2
To Create a Virtual Tour you want to log into your threesixty.tours Dashboard and this is what you will see (see image below). The dashboard is split in 3 sections:
- Tours
- Panoramas
- Photos
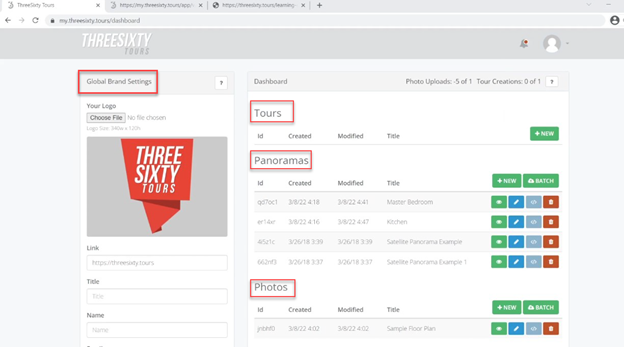
Dashboard
You can Upload your 360 panoramas images by batch instead of adding one image at a time. That’s saves you a ton of time. We cover how to batch upload here however here is more information about loading by batch https://threesixty.tours/doc/batch-upload-panoramas/
Click on Batch and drag your panoramas photos (files) or click to browse. Make sure to tick the check box to Auto Create a tour with these panoramas. What this does is it create a virtual tour with these images. Once you loaded the images, click Upload.
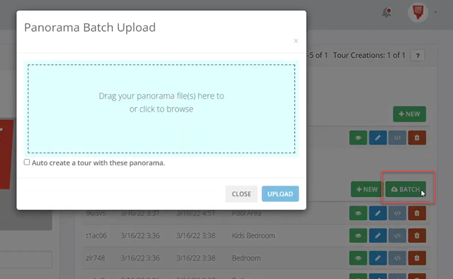
Panorama Batch Upload
The images should take about 1 minute or 2 depending on the size of the panoramas. Once you click close, the images will be loaded in the dashboard under Panoramas and a New Tour is added.
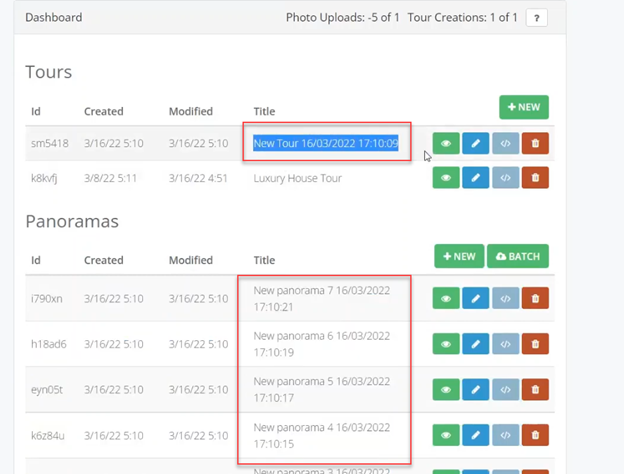
New Virtual Tour Created
To edit the tour, click on the pencil icon and the tour editing starts. Click on Tour Settings as shown on the image below. You can also see more info about editing a virtual tour here
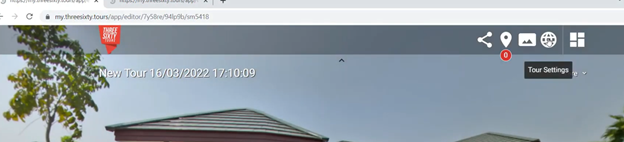
Virtual Tour Settings
You can change the title of the Tour, by adding a tour title.
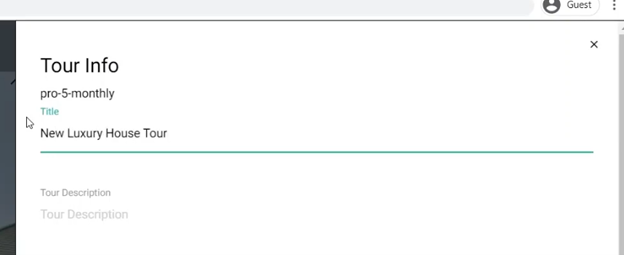
Virtual Tour Title
If you scroll to the bottom of the tour settings, you can change the names of the Panoramas, just simply click the pencil icon. Change the name in the virtual tour settings and save the panorama.
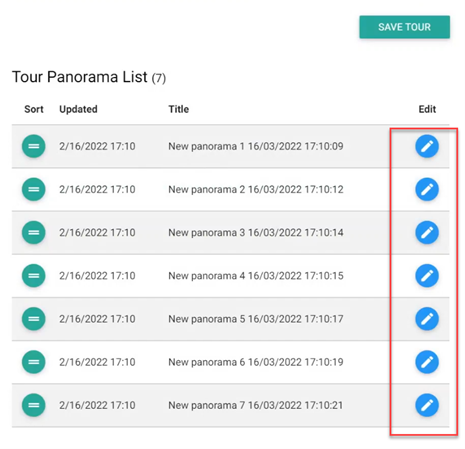
Panorama Image List
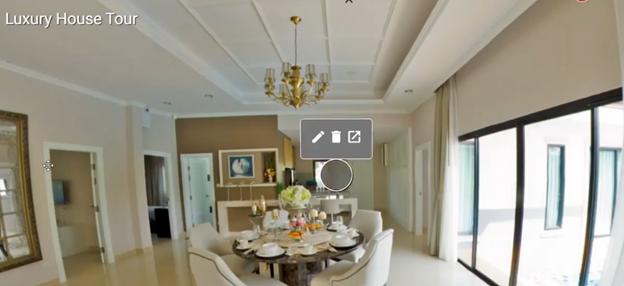
In the image below, we have Kitchen as our starting point of the tour. You can drag “front entrance” to the top so that the tour starts with the “front entrance”. To go to your next panorama, click on the pencil icon beside that panorama to start adding the tour content and editing that particular panorama.
In the image below we want to start with the living room and so we clicked on that.
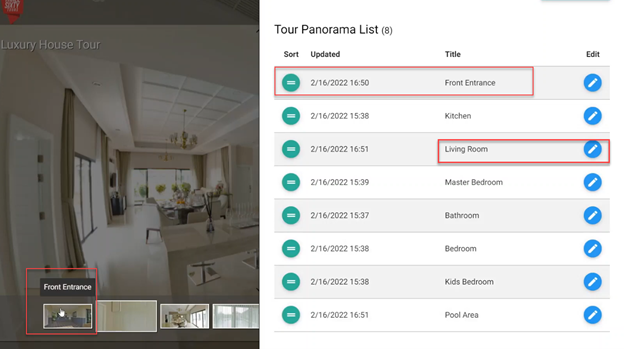
Virtual Tour Content List
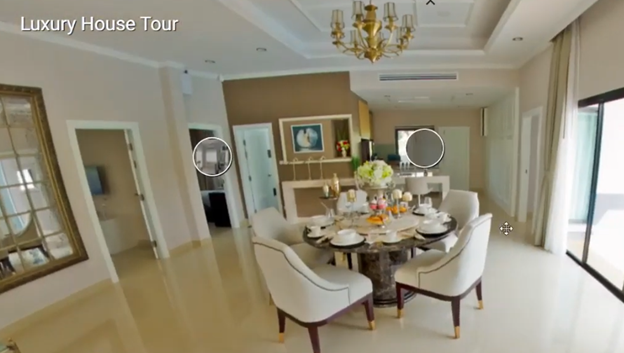
In your panorama, Right click to place a marker or a hot spot. To edit the marker click on the pencil icon.

Adding Marker or Hotspot
Choose “Tour Content” and choose the panorama you would like to add then save marker.
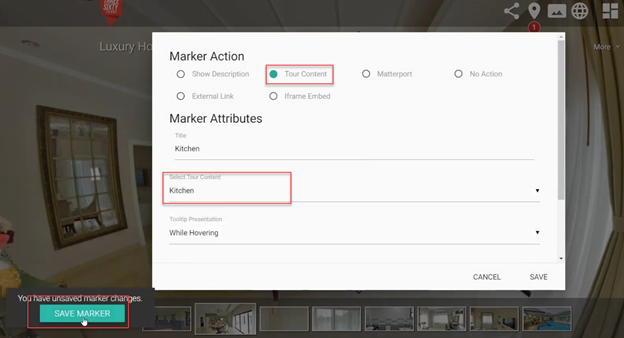
Choosing Virtual Tour Content
Once it is saved you should now see a circle with the image of the panorama, in this case an image of the Kitchen.
Virtual Tour Content Panorama
Start adding places of all the panoramas you want. In the example below we added the master bedroom, front entrance, and pool using the same process.
Virtual Tour Content Panorama
You are showing people how to their way around the house or property so you want to make sure you connect the whole house.
Next we want to add an intro video to the 360 tour. To do that you right click to place a marker or a hot spot. To edit the marker click on the pencil icon.
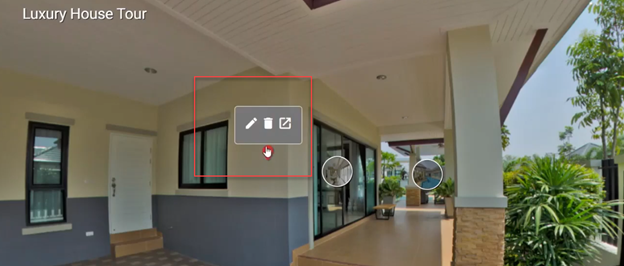
Edit Marker or Hotspot
There are 2 ways to add a video to your 360 tour. The fist method: On Marker settings, choose External Link. Add title and the video external link as shown in the image below.
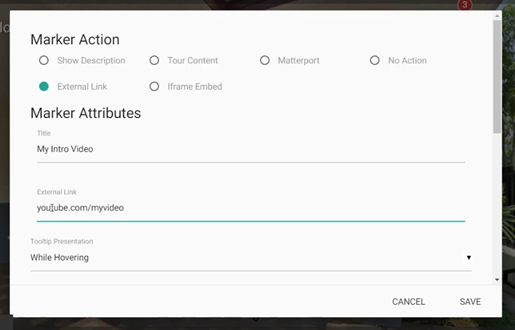
Marker External Link
Scroll down and choose the icon that you like. You can also add marker animation Flash if you like. You can also change the Marker properties size and the icon color. Once you are done then click save.
Marker Video Icon
And your video is loaded in the tour. You can also add custom markers if you would like to add a custom icon instead of the built-in icons. You can read more on that here.
Marker Video Icon Display
That’s the first way to add an intro video in the tour using External Link when you create a virtual tour.
The 2nd method is by choosing “Iframe Embed”. On Marker settings, choose Iframe Embed. Copy the embeded code from the Youtube video and paste it on the Iframe Embed. Then click Save.
If you do not know how to get the iframe embed code from Youtube videos then please see instructions from Youtube here.
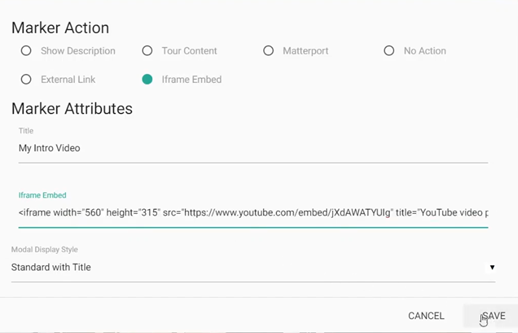
Iframe Embed
People can click on the play button and a window will open for the video instead of an external link. This is a great way to keep people on your website and on the tour. After all you want to create a virtual tour to keep people engaged on your 360 tour.
If you would like more information then go to our website and click on help center “Learning Center” to get more information on how to use the threesixy.tours virtual tour software.